Create and use a Vast Type share
Warning
Vast shares are available only on the GAIA cloud.
Note
To create shares, the project must be allowed to use Manila Service. If you don’t have access yet, please request it following instructions at this page.
Attatch the VMs to the storage network
Before creating the share, it is necessary to have at least one virtual machine connected to a storage network that will be able to see the vast shares.
To attach the VM on a storage network, on the Horizon Dashboard,
open the tab Project > Compute > Instances.
Select the desired VM and click on “Attach Interface”. In the popup menu, select the network GAIA-OS-VAST-SH.
Repeat the same operation for each VM that will mount the shared filesystem.
Create the share
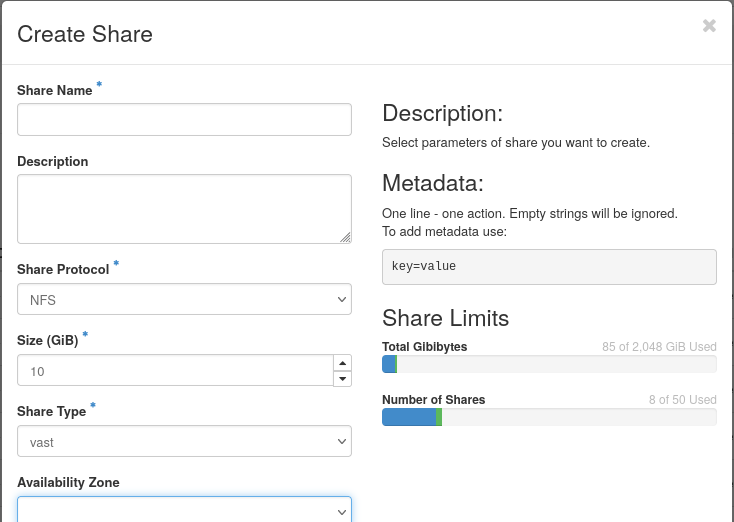
On the Share > Shares tab, create the share clicking on the button Create share. In the popup menu set:
share name: the name you want to give to the share
share protocol: select “NFS”
size: the size of your shared filesystem
type: select “vast”
Availability Zone, Share Group and Make visible for all projects: leave blank
Set access rule
Danger
The creation of the access rules is mandatory in order for the share access to be secured.
On the tab Share > Shares select the share just created and in the dropdown menu select Manage Rules.
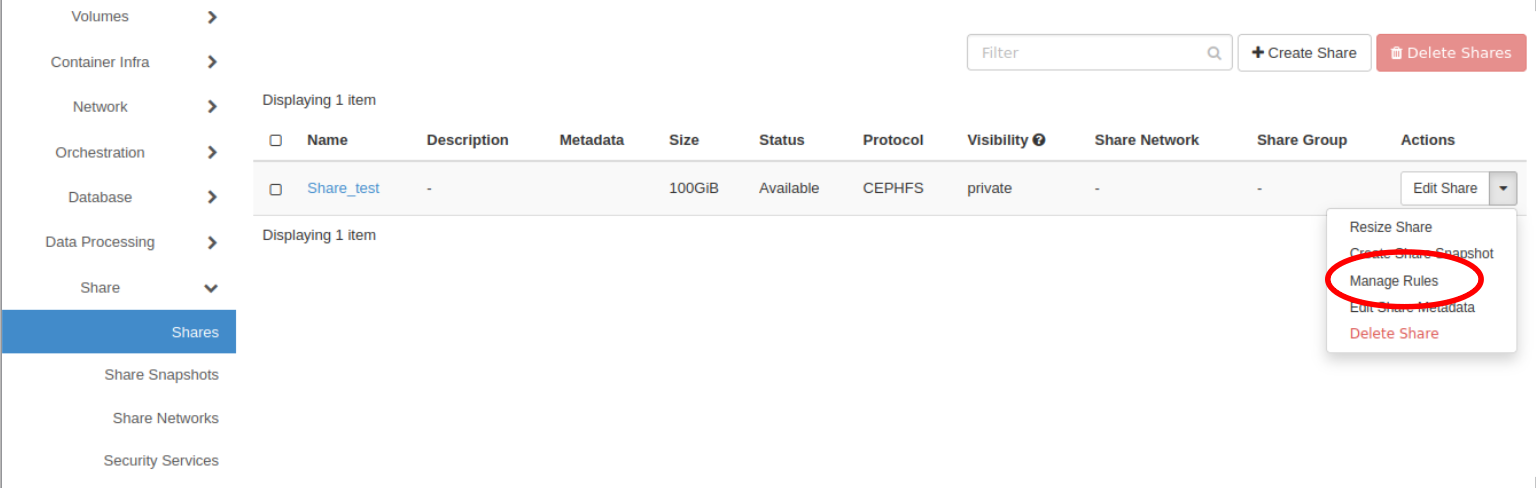
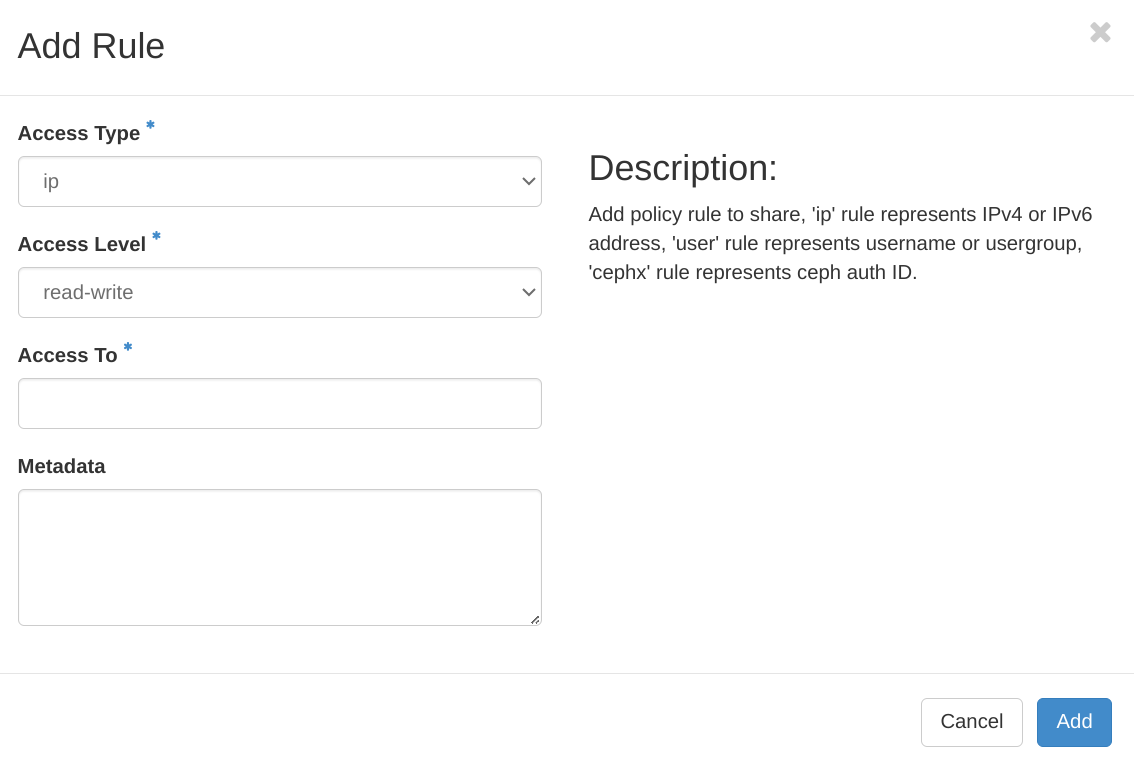
Click on Add rule and set:
access type: ip
access level: read-write or read-only (depending on your needs)
access to: set to the fixed IP of the VM on the
GAIA-OS-VAST-SHnetwork(one rule per VM)
After clicking on the “add” button, go back to the Share > Shares. Click on the brand new share to display the
Share Overview. The “Export locations: Path” and “access key” and “access to” keys are displayed. This
information will be used to mount the share on the virtual machines.
Mount the share on the VMs
Warning
In the following example, we will consider VMs using Ubuntu 26.04 LTS. Please refer to the network guide of the operating system of your VM to be sure about the operations to be done.
You are now ready to mount the share on VMs.
Install the package “nfs-common” on the two VMs.
$ sudo apt update
$ sudo apt install nfs-common
Create the mount point in the virtual machines (in our example “/mnt/share_manila”)
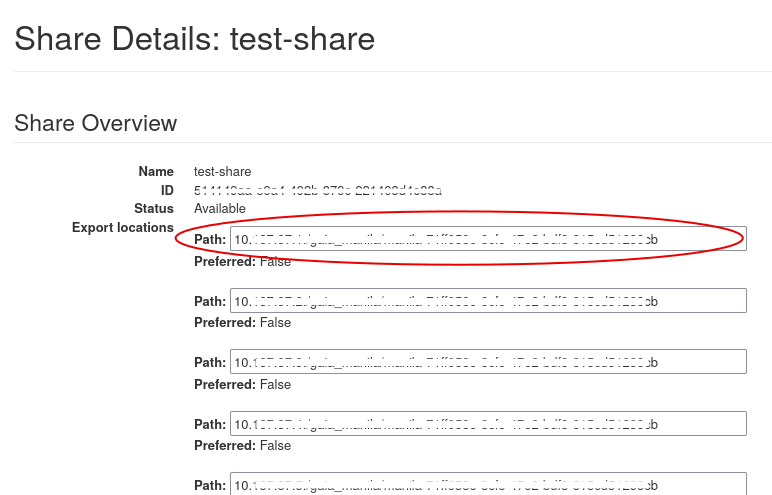
To mount the share you will need some information contained in the “Share Overview” page on OpenStack dashboard, in particular you will need one of the PATH:
Note
The “Export locations: Path” field contains more than one path. It is recommended to use different paths for each VM, in order to balance the load on the share network.
The command is:
sudo mount -t nfs <PATH> <MOUNT_POINT>
Where <PATH> and <MOUNT_POINT> are the following:
<PATH>is the value of the field “Export locations: Path” in the Share Overview page
<MOUNT_POINT>is the path to the mount point on the VM (in our example “/mnt/share_manila”)
NOTE: If you are using a different Linux distribution, please refer to the NFS user manual to be sure that the syntax you are using is appropriate for the NFS version installed.
Then repeat the same steps for the second VM as well. Now the two VMs share the same filesystem