Create and use a GENERIC_TYPE share
The following sections describe the steps needed to create a share and mount it on two VMs attached to a local network. Note that the user needs to configure the VMs in a way that allows logging in via ssh.
Request to be enabled to the service
The user willing to make use of the Manila service needs to send an email to superc@cineca.it, communicating
how many shares are needed.
their dimensions (GB).
the tenant’s name.
Once the tenant is enabled to the service by the User Support Team, all users of the tenant will be able to use the service.
Create share network
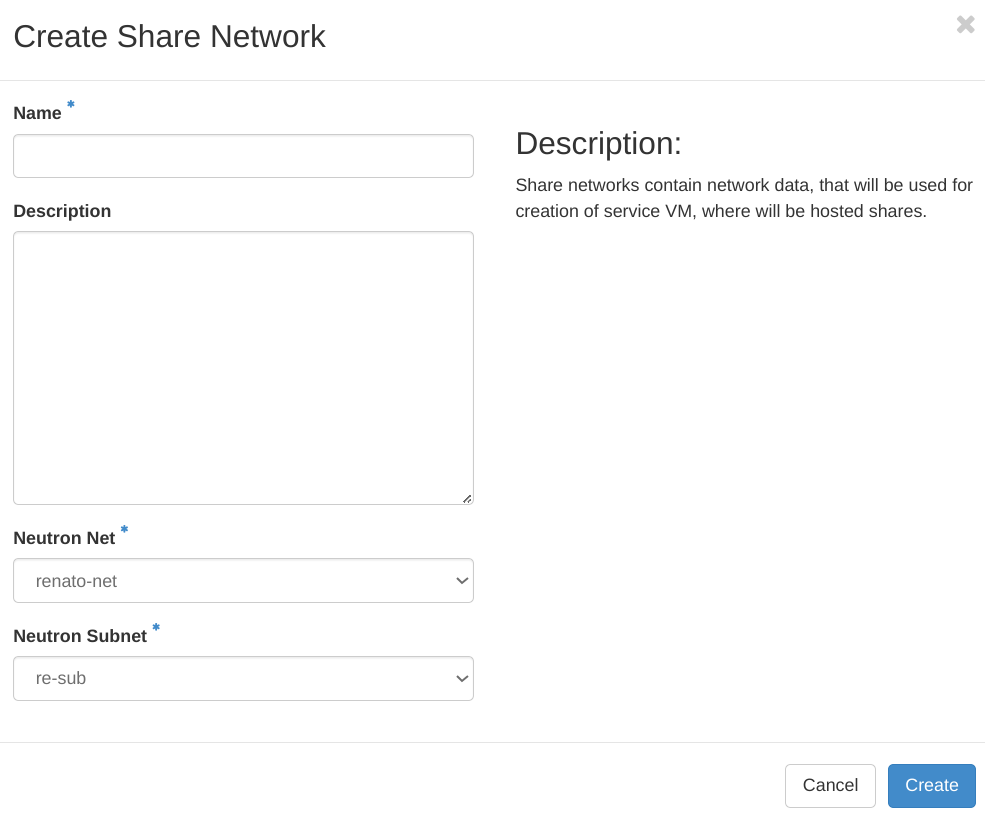
As a first step, in the Horizon Dashboard you need to create the share network by clicking on “Create Share Network” in “Share → Share Networks” and set the value for the following attributes:
Share network name.
network: choose the desired network, in our example example_share_guide_net.
subnet: choose the desired subnet, in our example example_share_guide_subnet.
Click on the “save” button.

Create the share
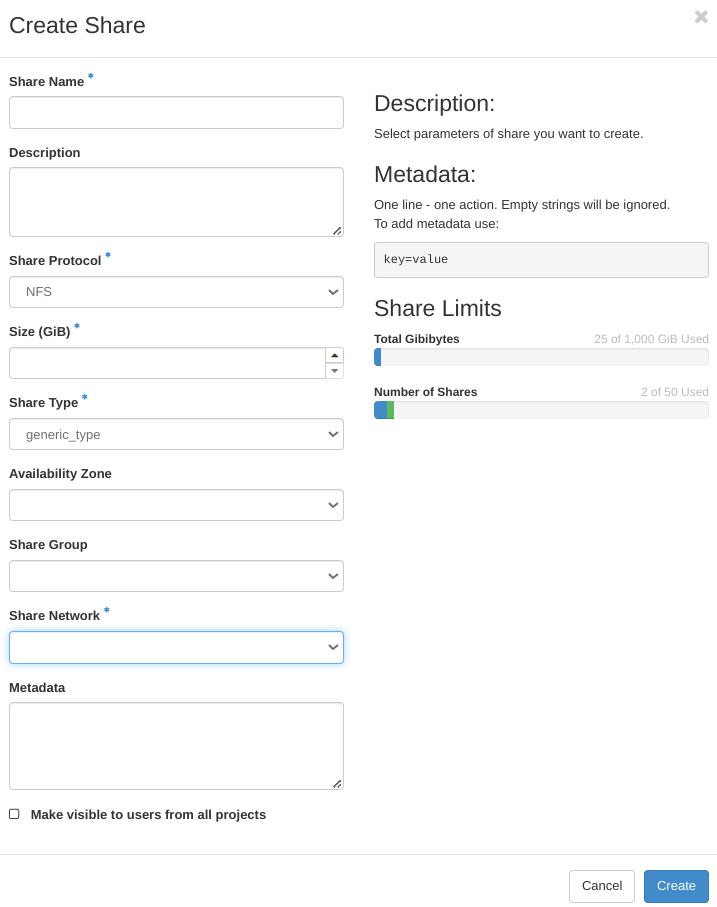
Create the share by clicking on “Create Share” in “Share → Shares” and setting the following information:
share name
share protocol == “NFS”
size (on the right side is visualized information about the actual available and used space within the tenant)
Type == “generic_type”
Leave blank the option “Make visible for all projects” because it is not enabled
In the end, click on the “create” button.

Set the access rule(s) on the share just created.
On the OpenStack dashboard click on “Share → Shares”
select the share just created
in the menu on the right select “Manage Rules”.

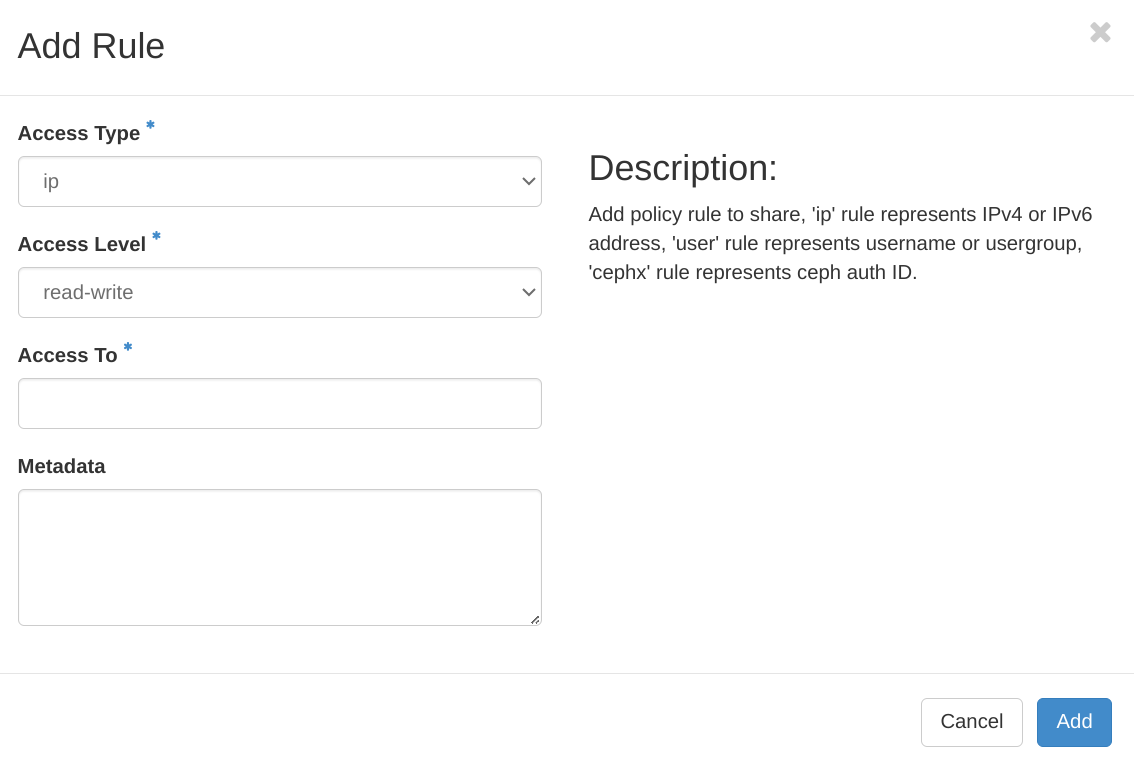
Click on “Add rule” and set:
access type: Choose “ip”, the rest of options displayed are not available for NFS share’s protocol.
access level: read-write or read-only (depending on your needs)
access to: write the IP with permission to access the share. Only one entry is allowed per rule, therefore, you will have to include a rule for the fixed-IP of each VM.
Finally, click on the “add” button.

Mount the share on the VMs
You are now ready to mount the share on VMs. In the following example, we will consider two VM with Ubuntu 22.04 OS. Please refer to the network guide of the operating system of your VM to be sure about the actions to be performed.
Login into the first VM.
Upgrade the packages installed in the VM
sudo apt update
sudo apt upgrade
Install the client. The package name is “nfs-common”.
sudo apt install nfs-common
Identify or create the directory in which the share will be mounted (e.g., “/mnt/share_manila”)
sudo mkdir <MOUNT_PATH>
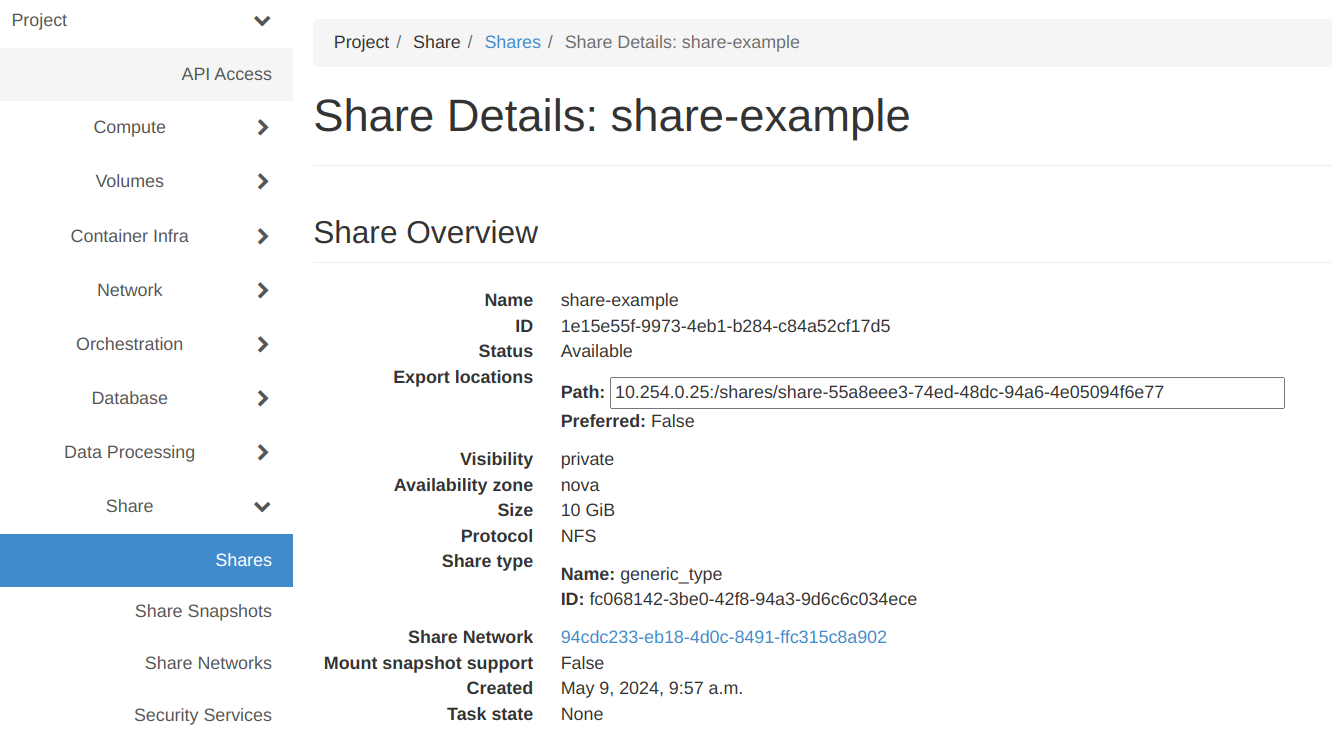
To mount the share you will need the share <ACCESS_PATH> displayed on the “Share Overview” page on OpenStack dashboard under the keyword “Export Location/Path”. Gather this information and proceed.

Mount the share with the following command. Beware that different versions of nfs-common are available for different versions of Ubuntu and the syntax of the mount command could change.
sudo mount -t nfs -v <ACCESS_PATH> <MOUNT_PATH>
Then, repeat the same steps for the second VM.