Floating IP: allocate and associate
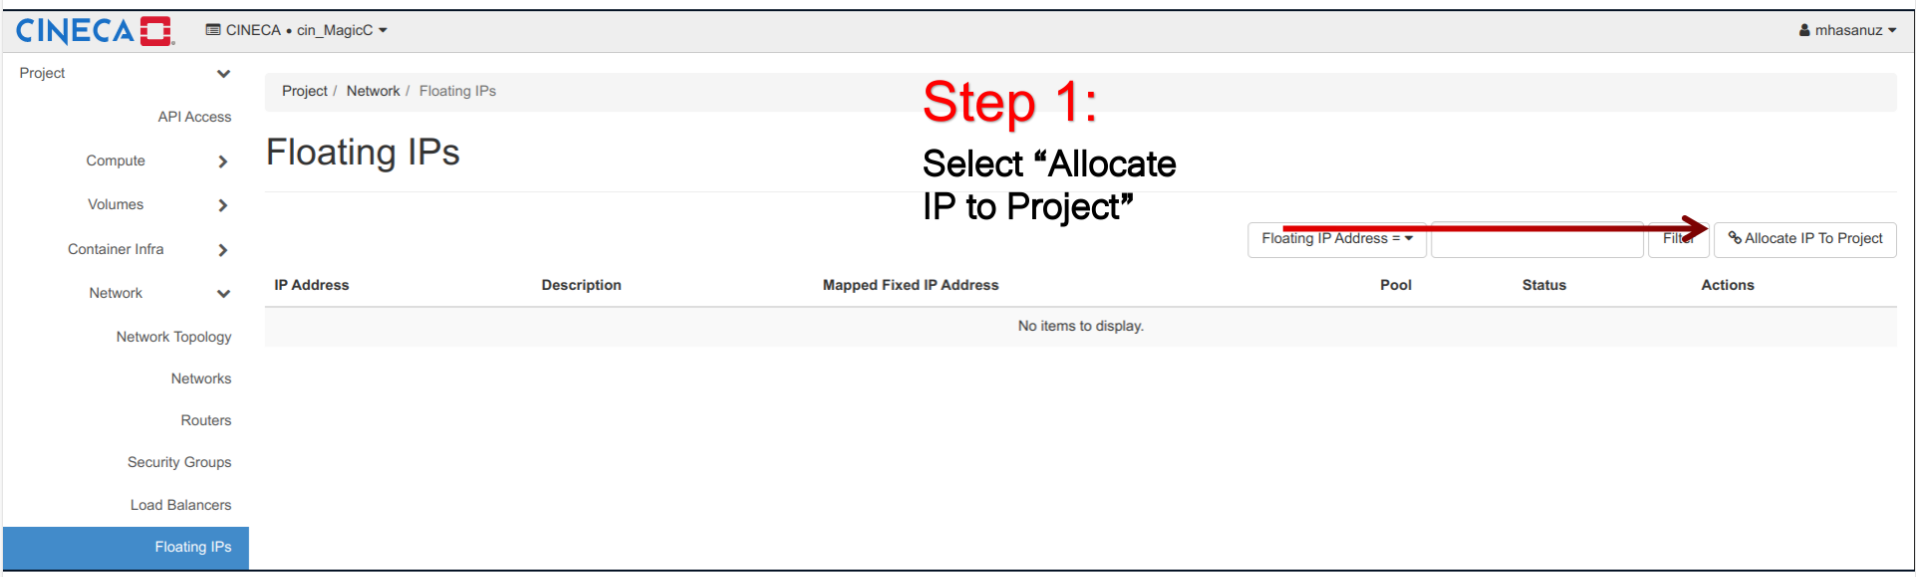
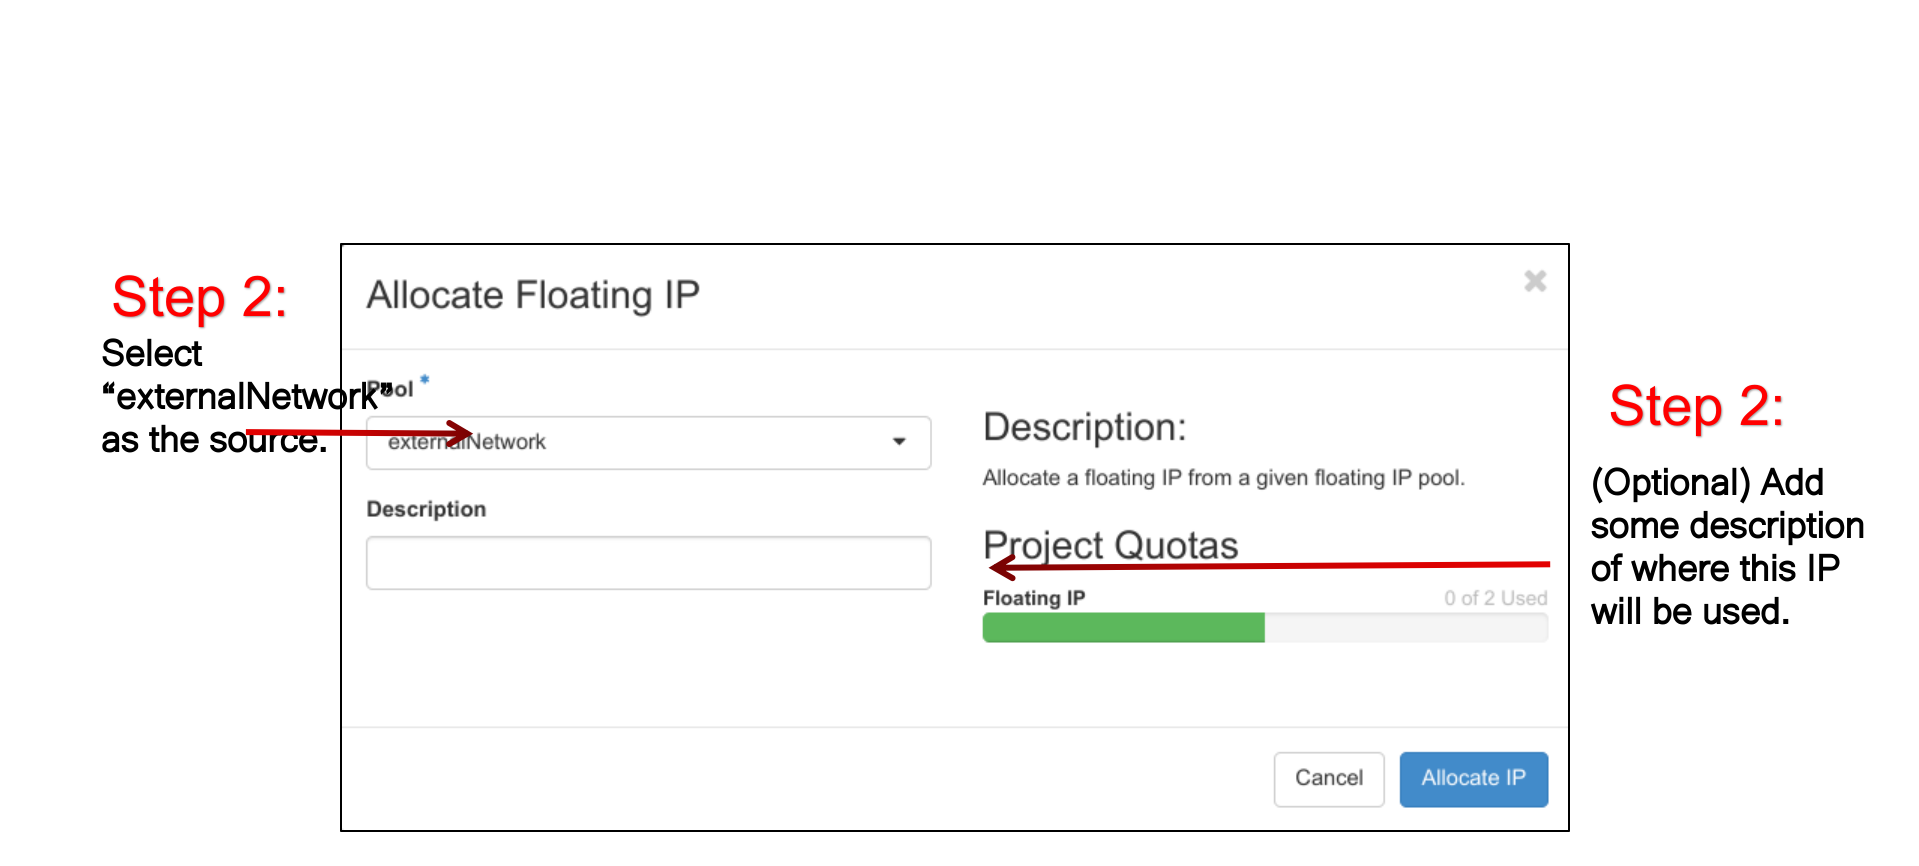
Allocate a floating IP
The allocation will reserve and return a floating IP from the available pool for the project.
To allocate a floating IP to a project, in the Horizon Dashboard
click on “Network → Floating IPs”
then click on the button “Allocate IP to Project” on the right side of the dashboard page.
Once allocated, a floating IP can be associated with running instances.
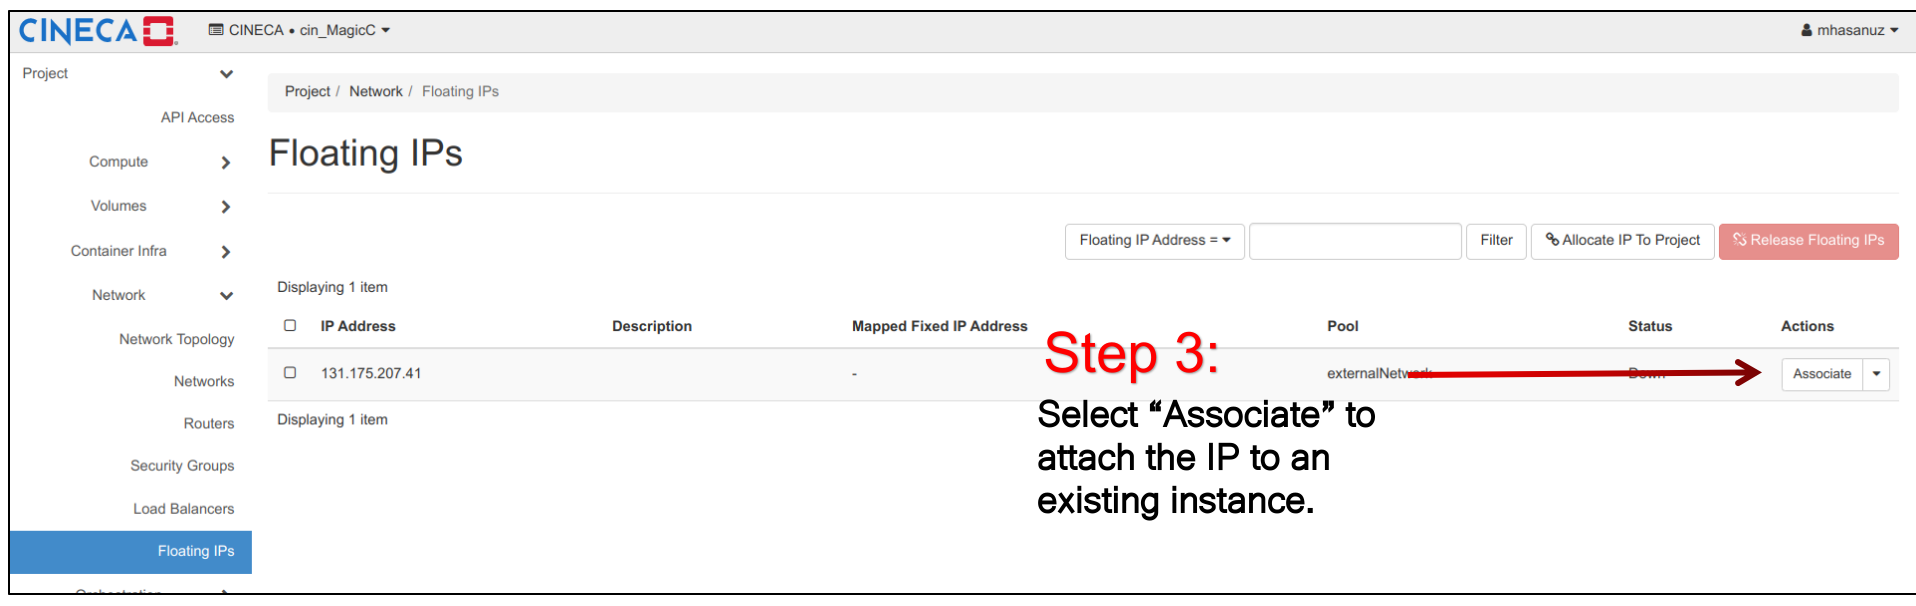
At any moment, floating IPs can be de-allocated from a project using the available action for the floating IP.
Important
It should be noted that if you de-allocate a floating IP from a project and then allocate one again, the floating IP will not be same as before, as the floating IP is automatically select by the system from the available pool.
Associate a floating IP to an instance
With the association of the floating IP to an instance, the instance becomes reachable from the external network.
Click on “Associate” action on the right of the page “Network → Floating IPs”.
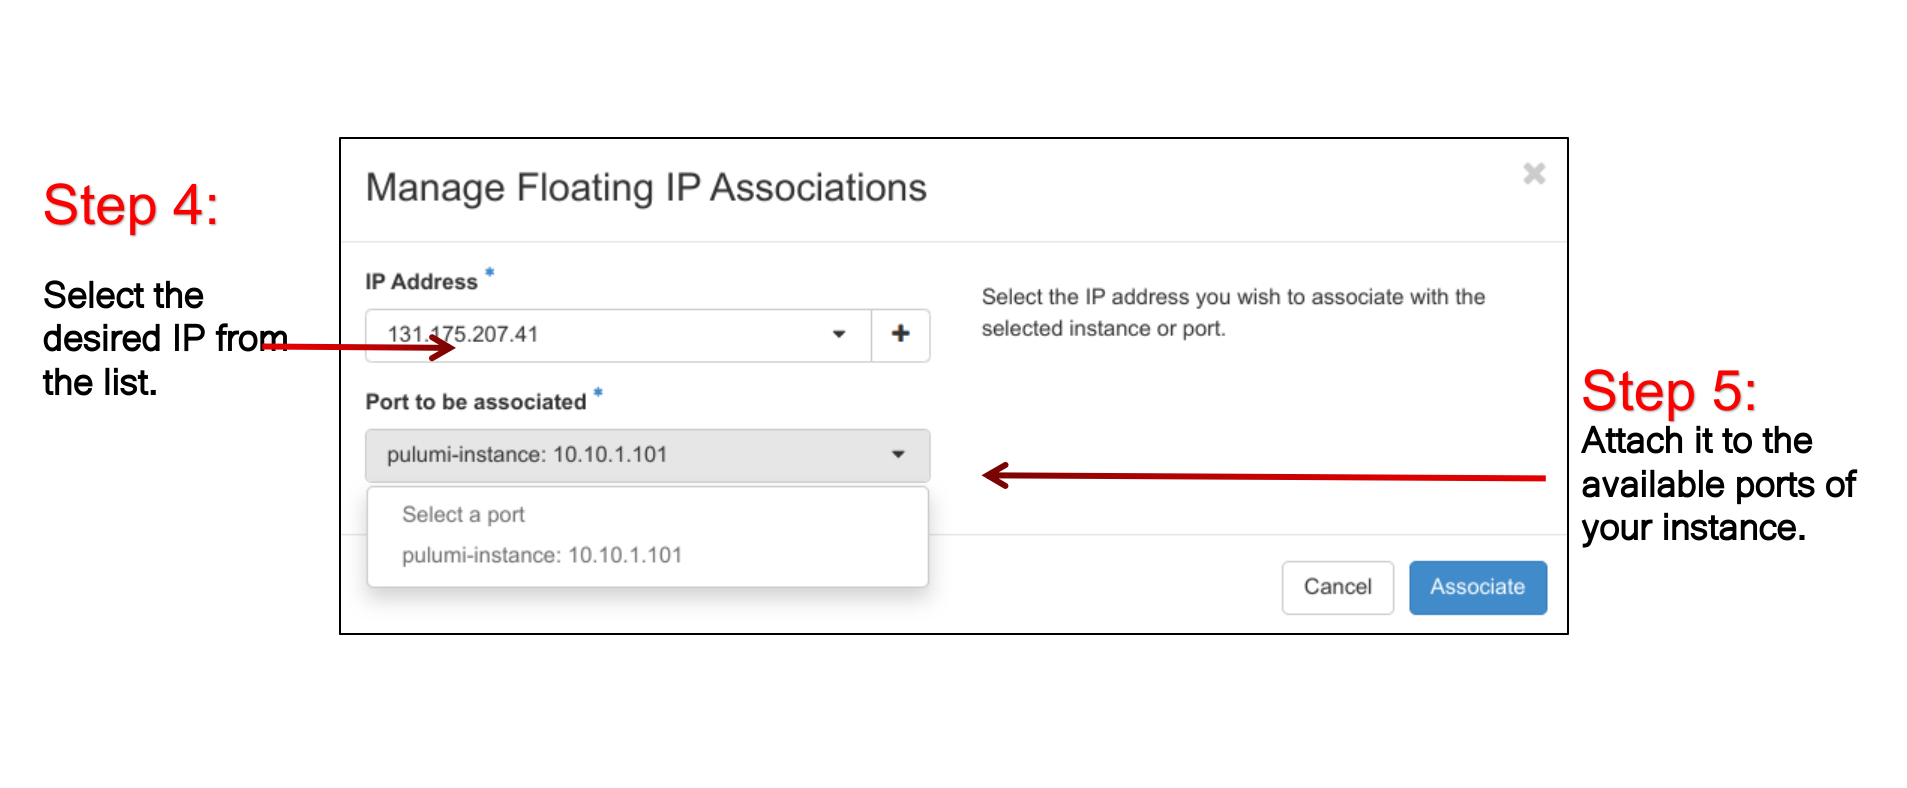
In the popup, select your virtual machine by the menu in “Port to be associated”.
The inverse action, “Dissociate Floating IP”, is available from the “Compute → Instances” page.
At any moment, floating IPs can be de-associated from an instance using the available action for the floating IP.