Volume: create and attach
Create a volume
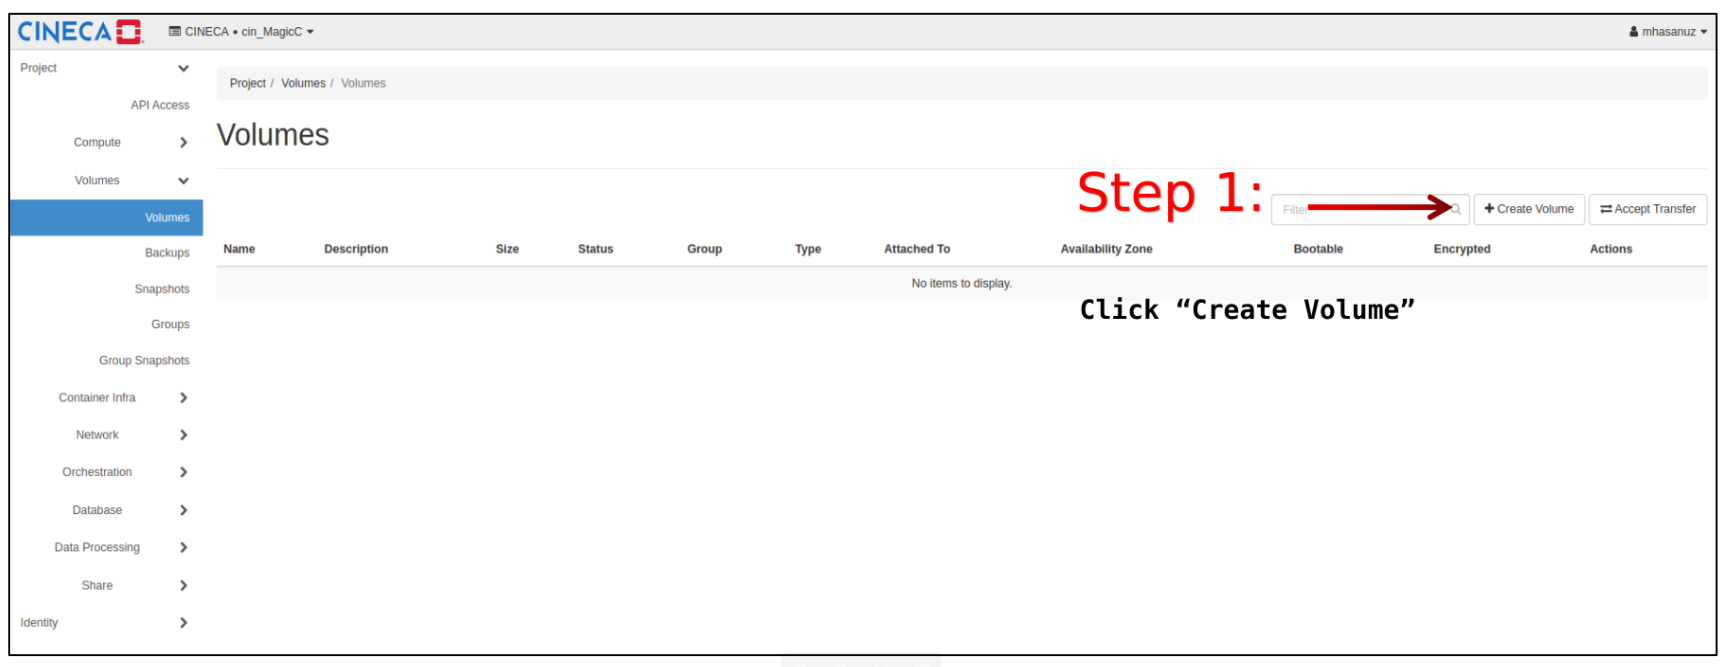
From the Horizon Dashboard, go to the “Volumes → Volumes” section and select “Create Volume”
In the pop-up window, specify
Volume Name:
A name for the volume.
Description:
Optionally, provide a brief description for the volume.
Volume Source:
No source, empty volume: Creates an empty volume. An empty volume does not contain a file system or a partition table.
Image: You can create a volume from a pre-existing image. If you select this, you will be able to select the image from a list of available images.
Volume: You can create a volume from a pre-existing volume. If you select this, you will be able to select the source volume from a list of available volumes.
Snapshot: You can create a volume from a pre-existing snapshot. If you select this, you will be able to select the snapshot from a list of available snapshots.
Type:
Each HPC Cloud system has a specific set of available volume types, but usually there is at least:
a generic volume type, which can be used for general purposes.
an encrypted volume type, which can be used for storing sensitive data (see Storing sensitive data for more details about encrypted volumes).
Complete volume type list can be found under Storage (Cinder Volumes) paragraph in the cloud specific section for each system.
Size (GiB):
The size of the volume in gibibytes (GiB).
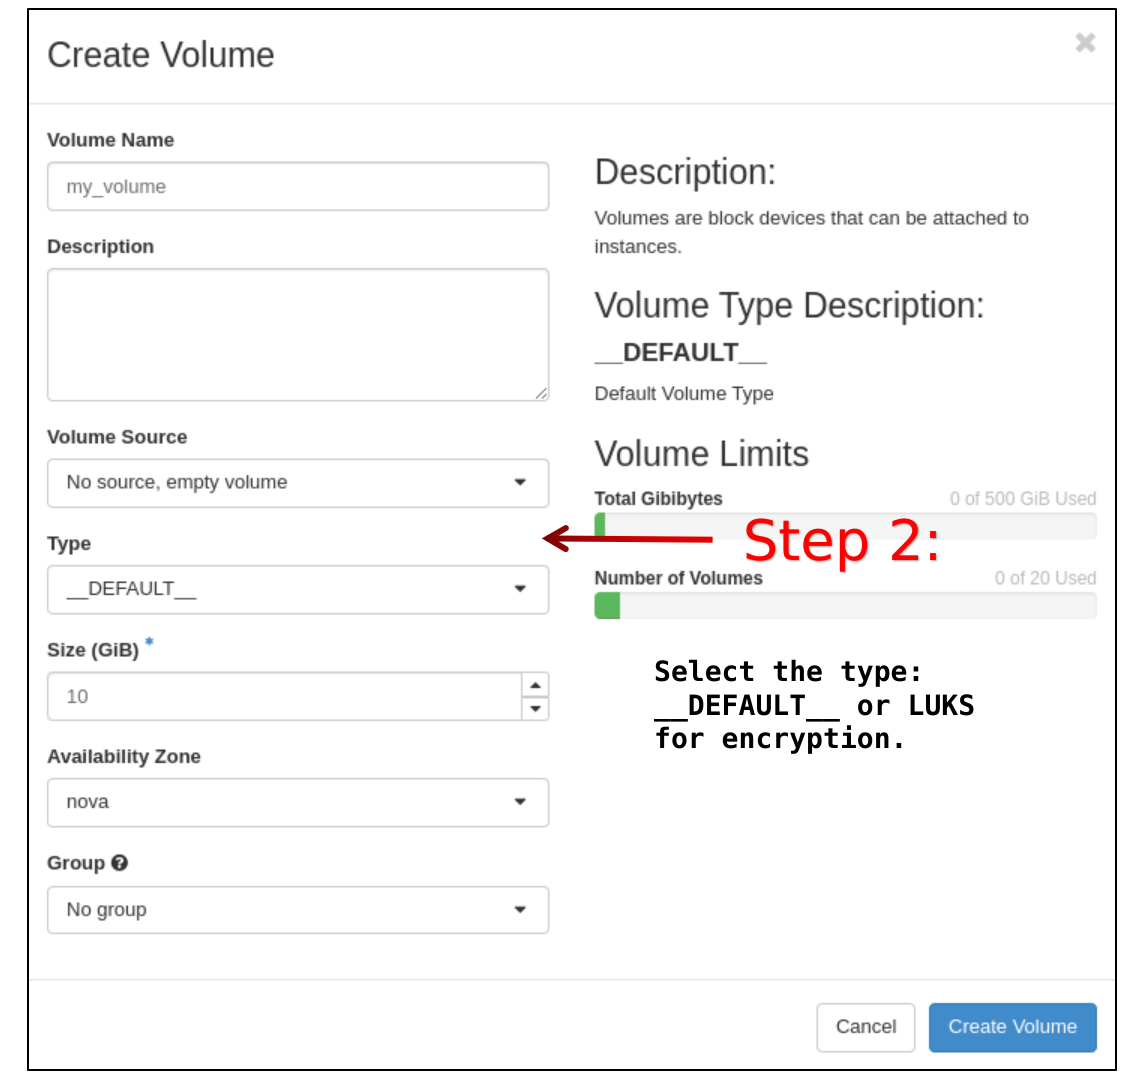
Finally, click on “Create Volume” button.
Attach/Detach a volume
To attach a volume to an instance, go to the “Volumes → Volumes” page and select the volume you would like to attach and then the action “Manage Attachments”

Select the instance you would like the volume to be attached to:
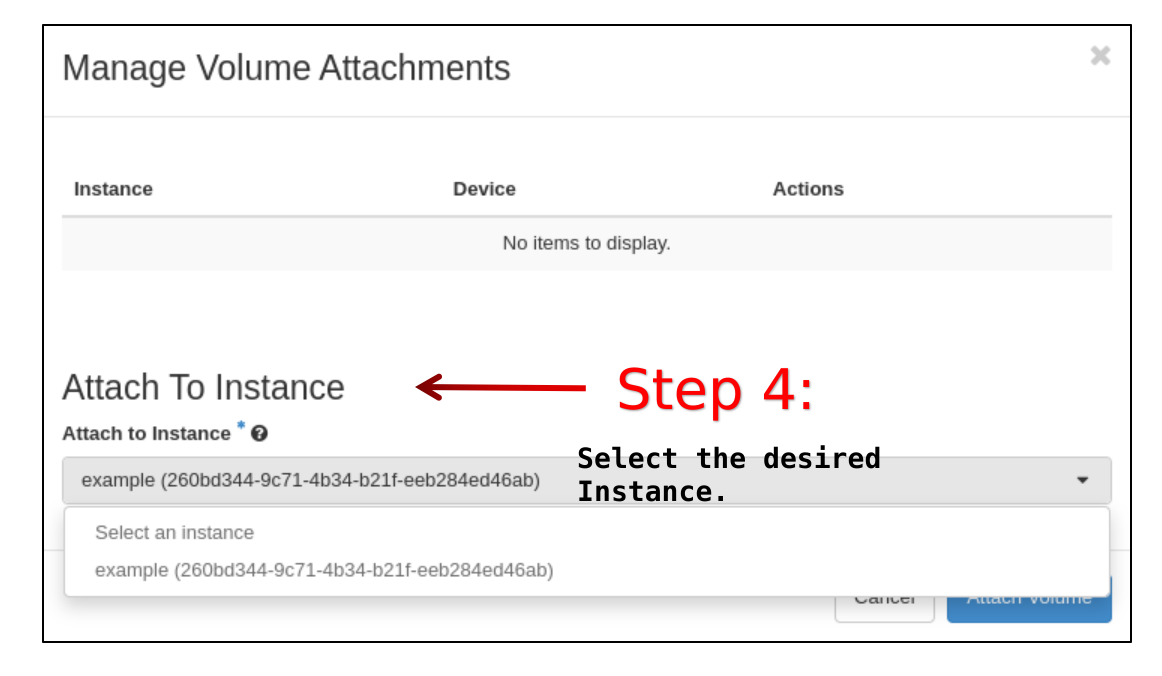
Click “Attach volume”.
At this point, you can view the status of a volume in the “Volumes → Volumes” tab of the Horizon Dashboard.
The volume can be is either in status “Available” or “In-Use”. The same “Manage Attachments” operation can be used to detach a volume from an instance.
When the volume is attached, in order to use for storing data you need to log in to the instance to partition, format and mount it (see Volume: format and mount).