Download RCM Software
Requirements:
Microsoft Windows 7, 8, 10, 11.
Linux: Ubuntu from 16.04, CentOS 7 (other distributions have been not tested)
Apple MacOS Moajave or newer (both version, intel and apple silicon cpu are supported)
Note
On Linux O.S. the user must modify the permission of the precompiled executable RCM with the command:
chmod +x <filename of executable>Download:
GitHub repository (github)
Basic Usage of RCM
Client/Server Interaction
- RCM operates as a client/server application. Every interaction with the application requires the server to execute specific tasks,
which may take some time depending on your Internet connection’s bandwidth and latency, as well as the current workload of the clusters.
To start RCM application, follow the described steps:
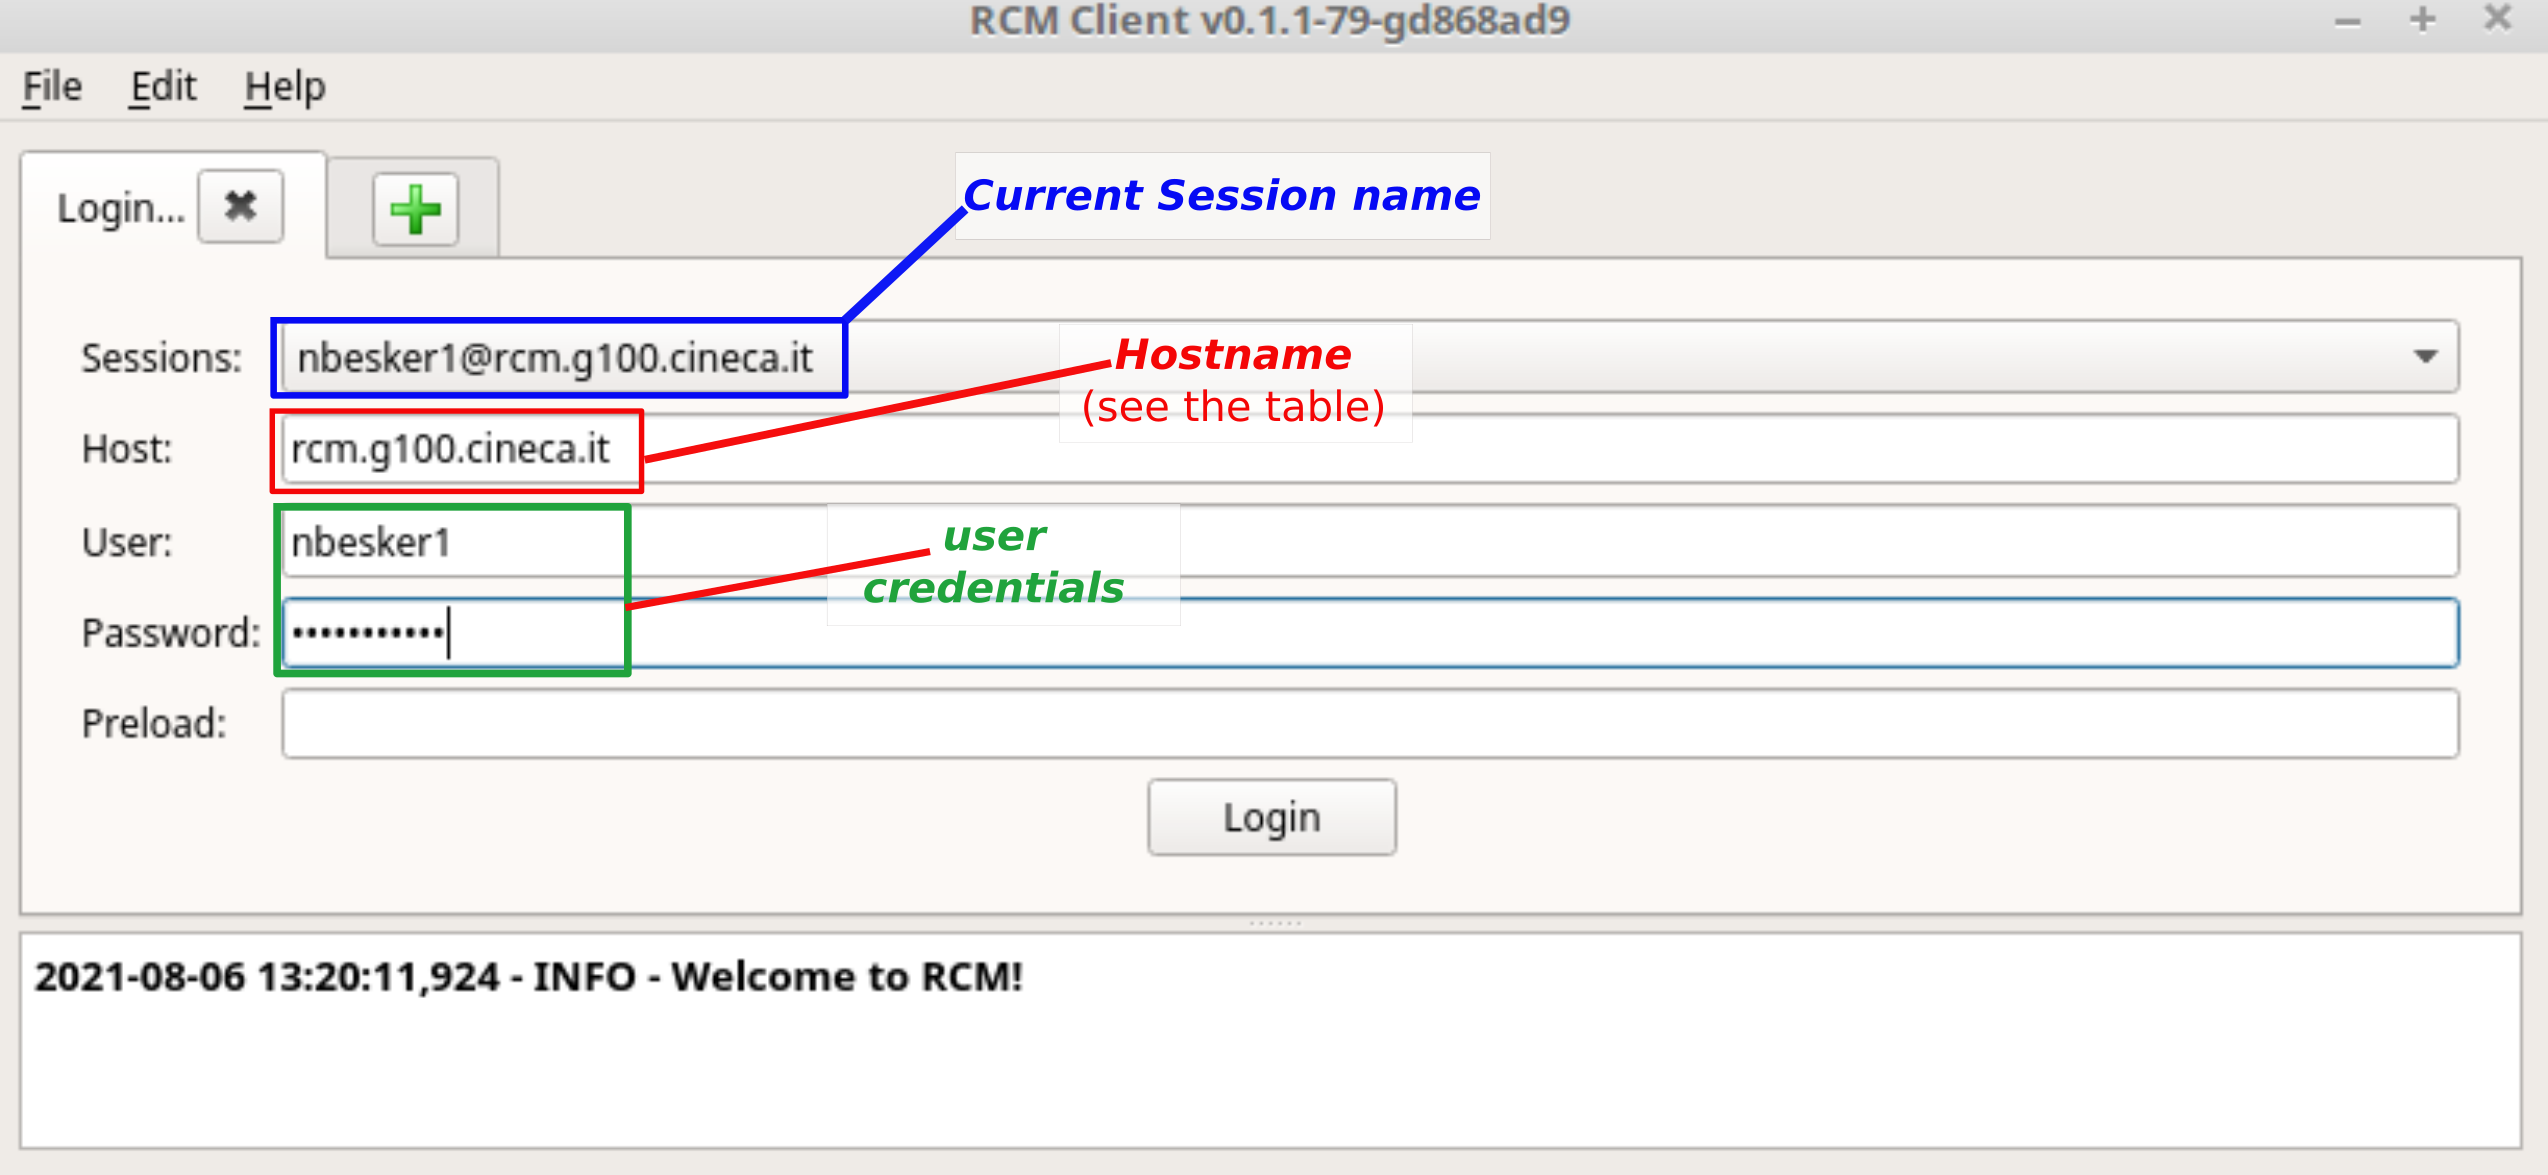
Launch the RCM executable
Input the Connection Details: provide the required hostname (see the table below) and your username. In case you already have a previous saved session, select it from the drop-down menu.
Authenticate: If you have a valid autentication certificate (How to manage authentication certificates), leave the [Password] field empty. Then, press the Login button.

Hostname Table
Cluster |
Hostname |
|---|---|
Leonardo |
rcm.leonardo.cineca.it |
Galileo100 |
rcm.g100.cineca.it |
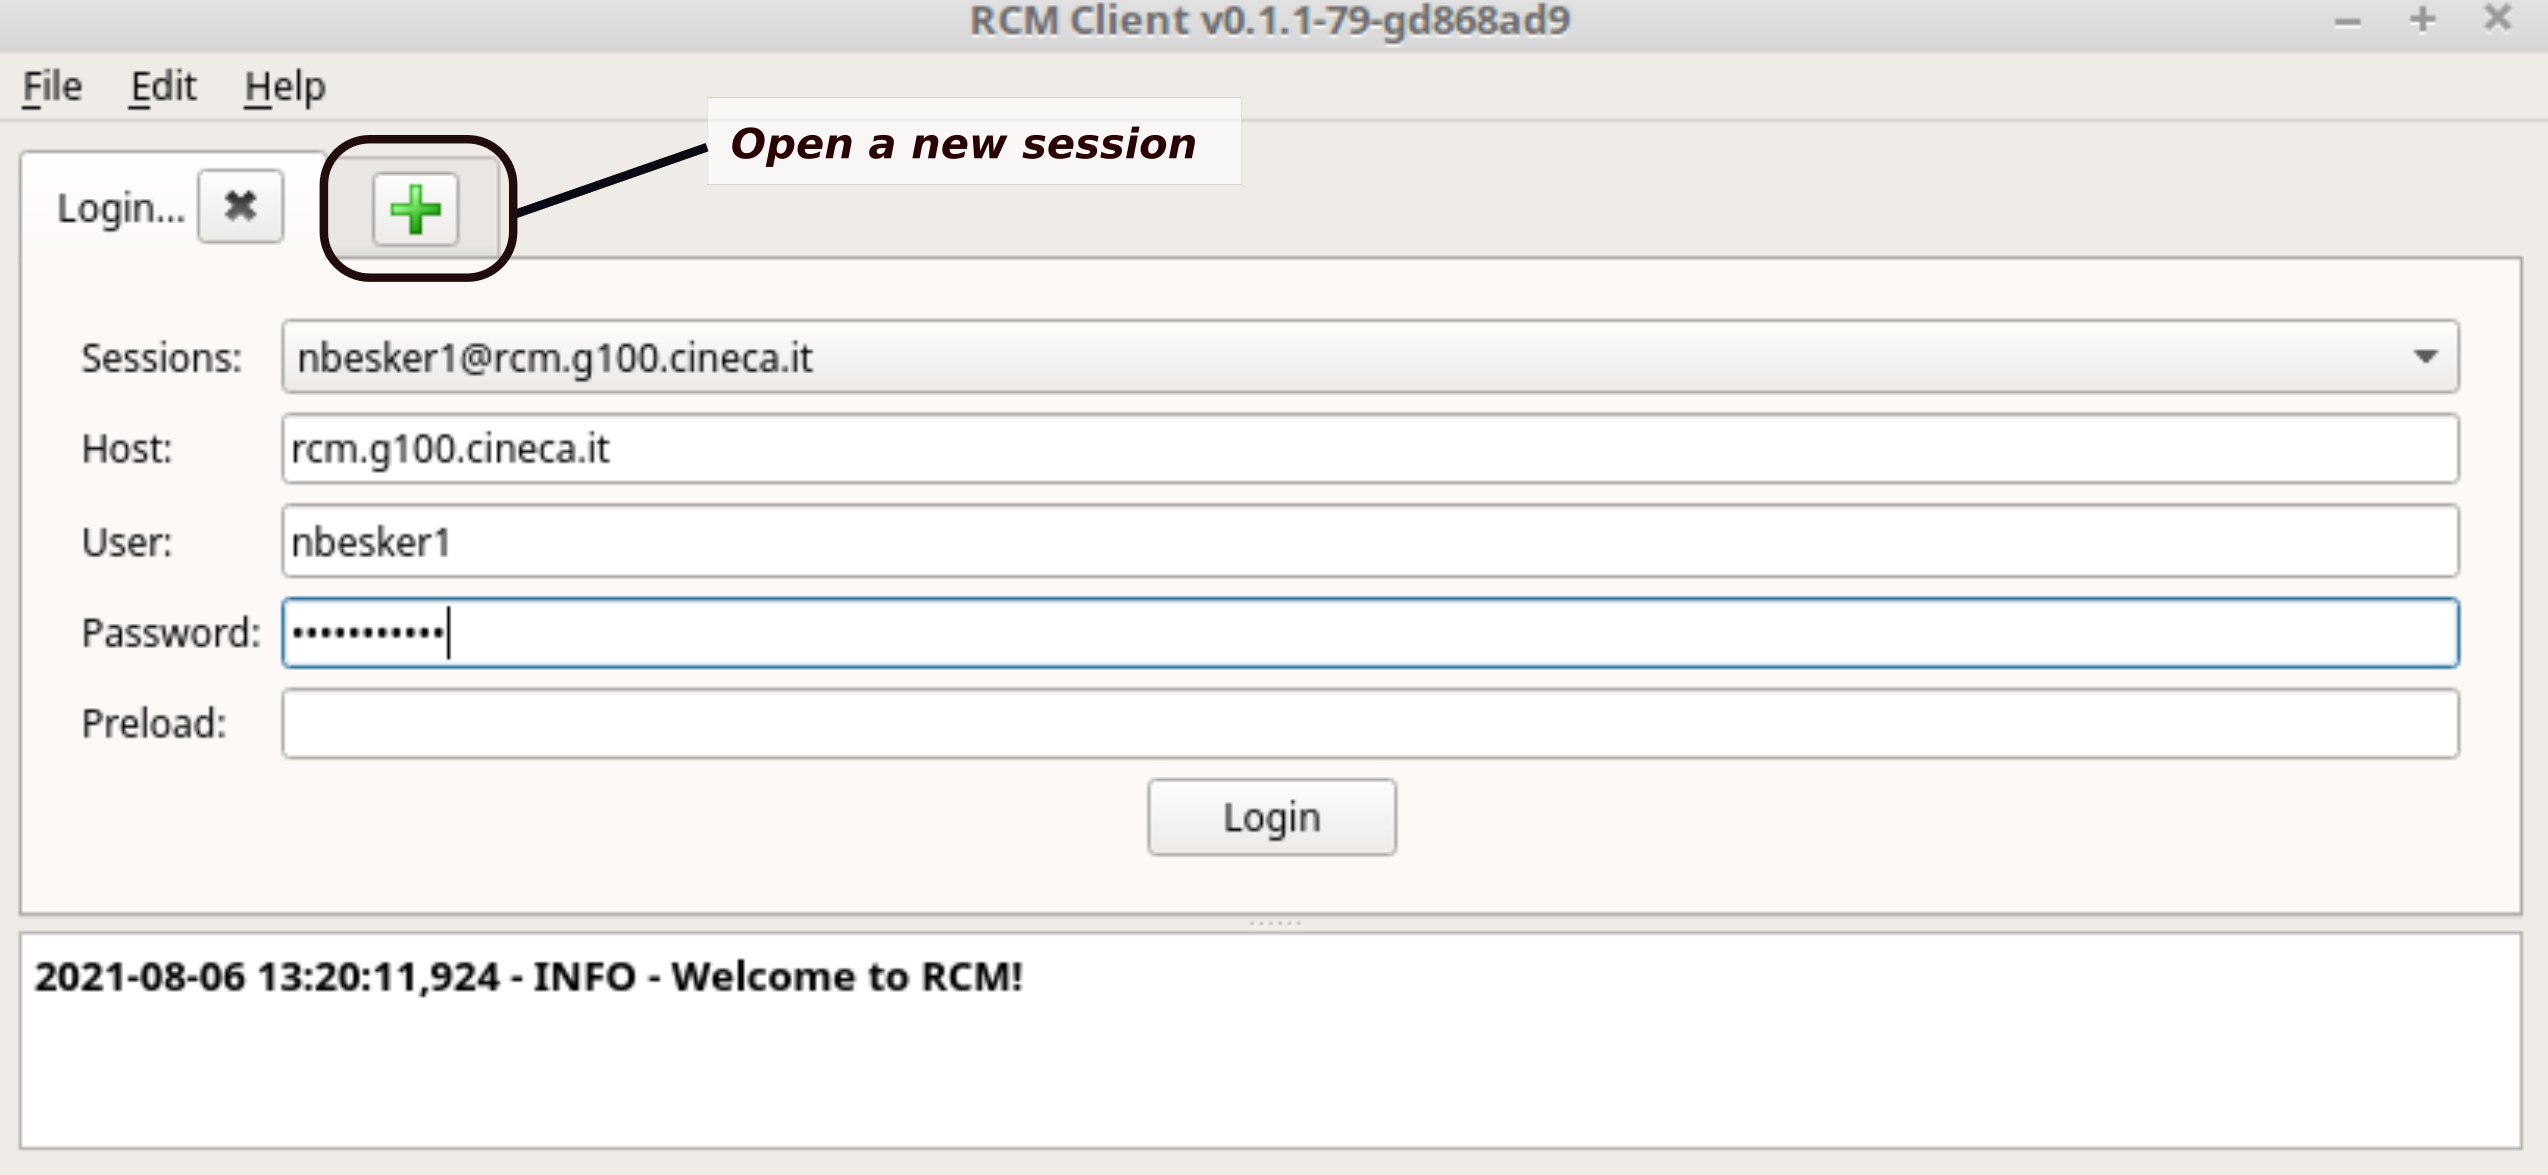
RCM can manage multiple sessions. To start a new one, i.e. one for each different cluster, just click on :bdg-black-line:` + ` button in the tab bar (see the figure). Then, input the connection details for the new session.
Once logged, a new tab will show the list of available remote display sessions. In case you did not create a display session yet, the list will be empty.
How to create a new Display
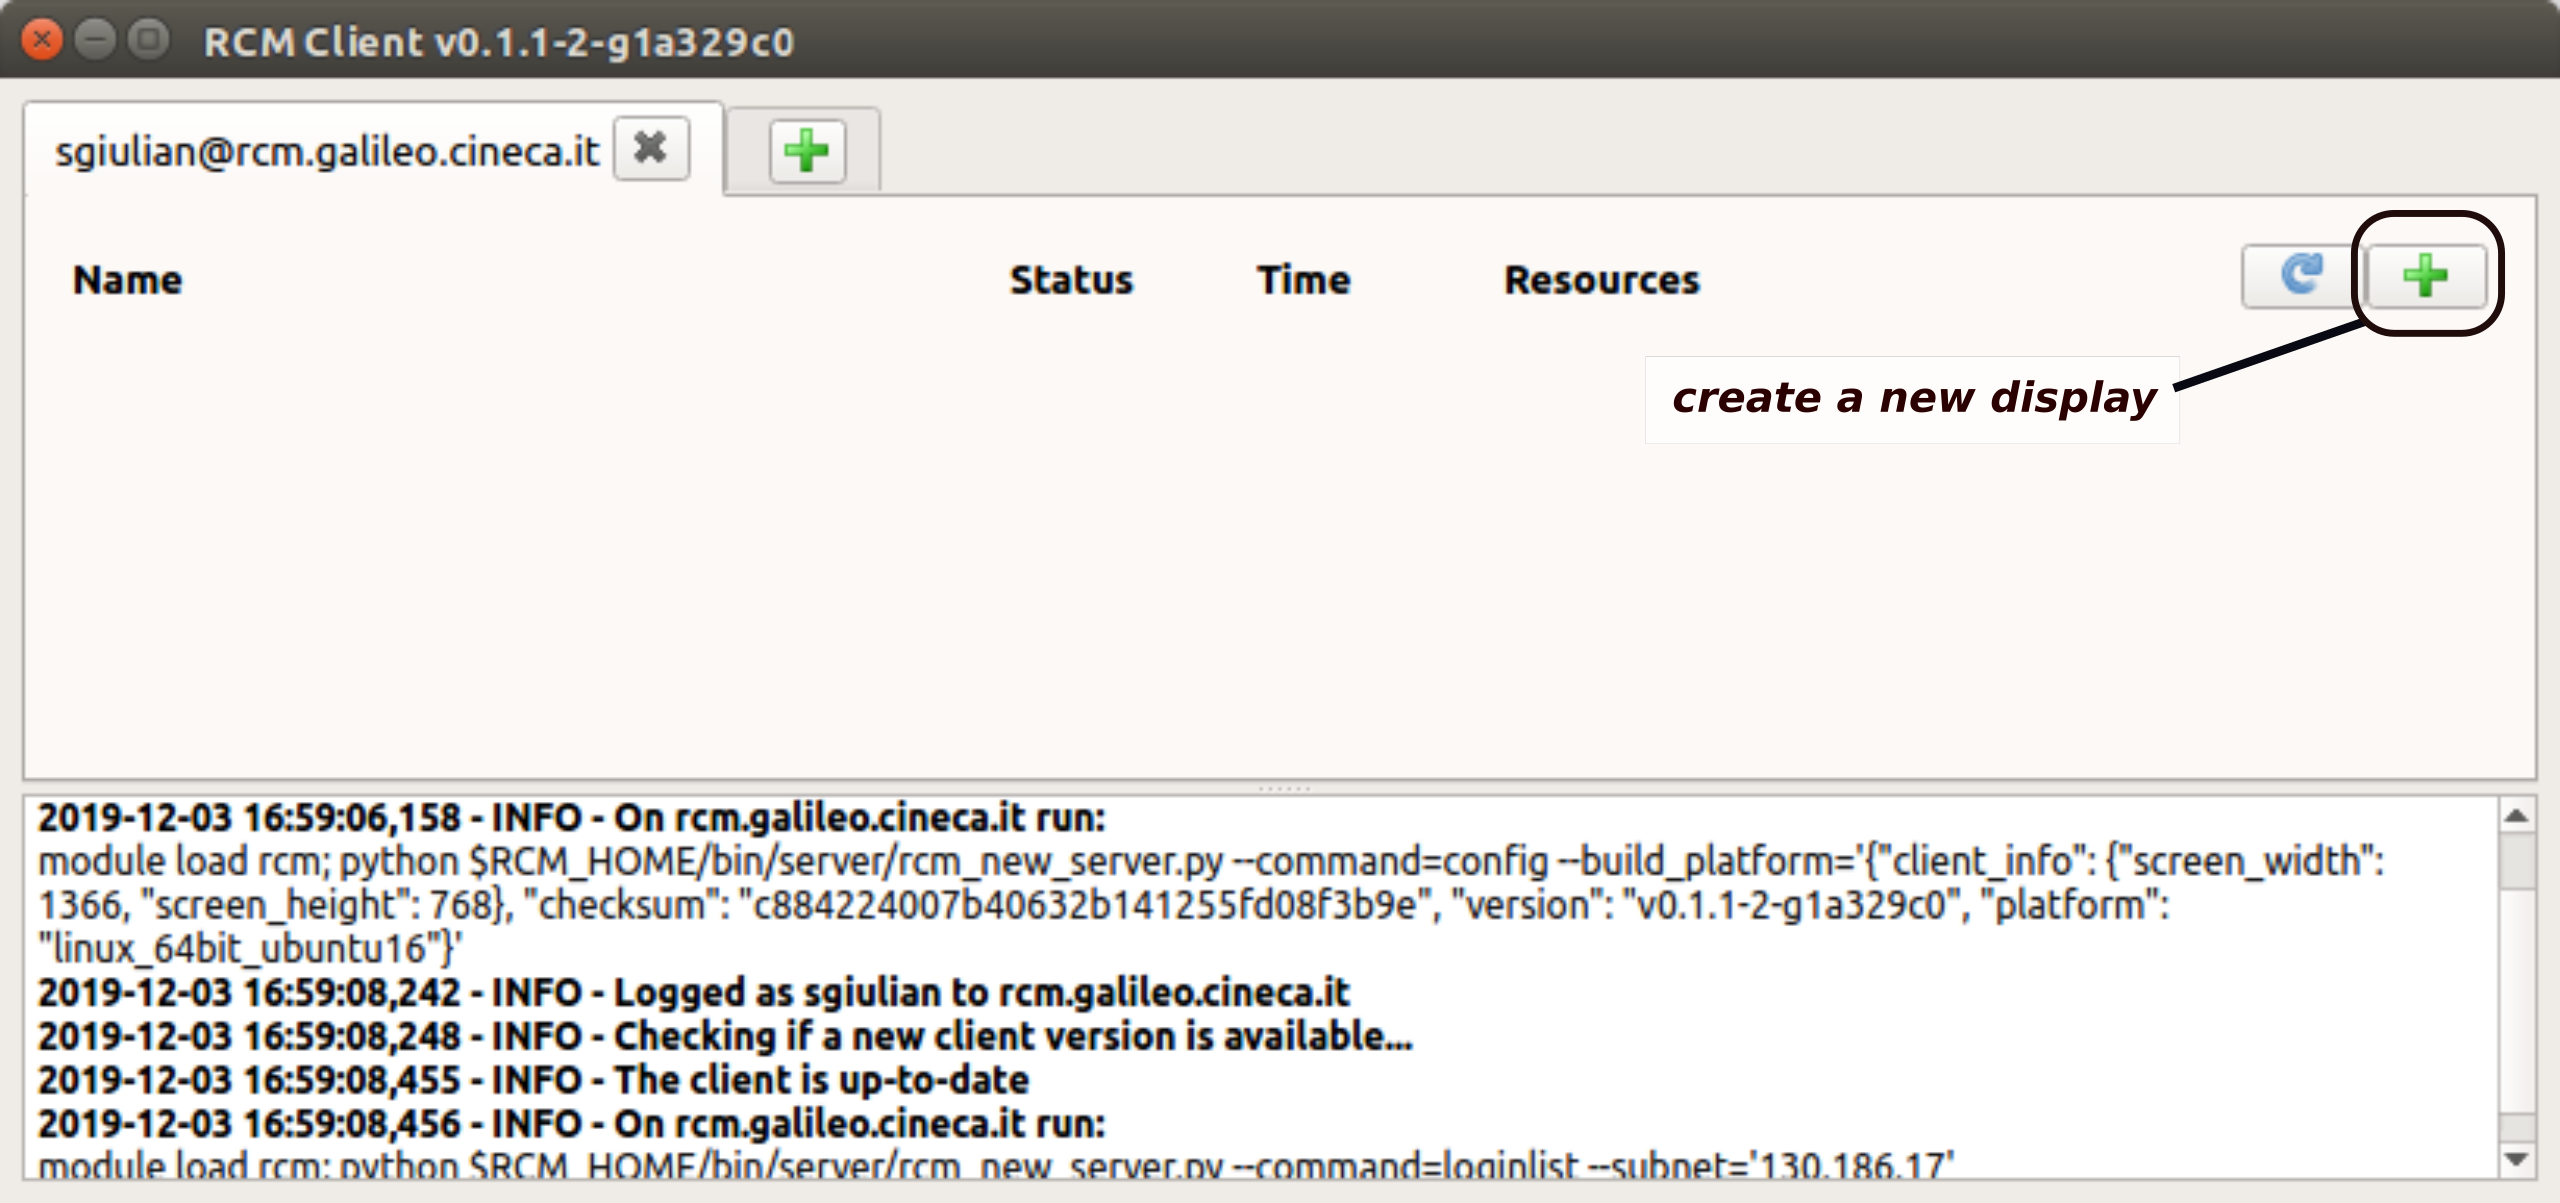
To create a new display, inside a session, just click on :bdg-black-line:` + ` button as shown in the figure below.
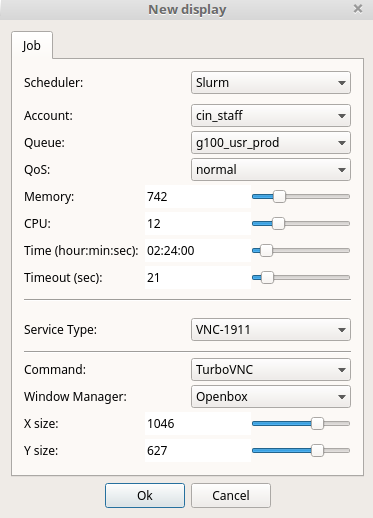
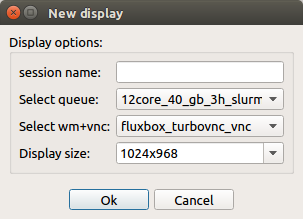
Once the connection is estabilished, a new window for the setting of connection will appear (see the figure below). The configuration options are:
Option |
Description |
|---|---|
Scheduler |
Choose between SSH (no scheduler) or Slurm. |
Account |
Select one of your project account |
Queue |
Specify the SLURM partition where the job will run. |
QoS |
Choose the proper quality of service (QoS) wich affects the job wall-time limits and permissions. |
Memory |
Define the RAM memory (GB) required for your job. |
Time |
Set the job walltime (up to 24 h). |
GPU |
Specify the number of GPUs |
Service Type |
The default serive is the latest version of VNC. |
Window Manager |
Choose a window manager for the VNC session:
|
Note
Hover your cursor over any configuration element for additional information about its functionality.
Click on :bdg-black-line:` Ok ` button in the dialog window, a remote display session will be created and the user will automatically attached to it. Also, a Turbo VNC window will be open (see the figure below).
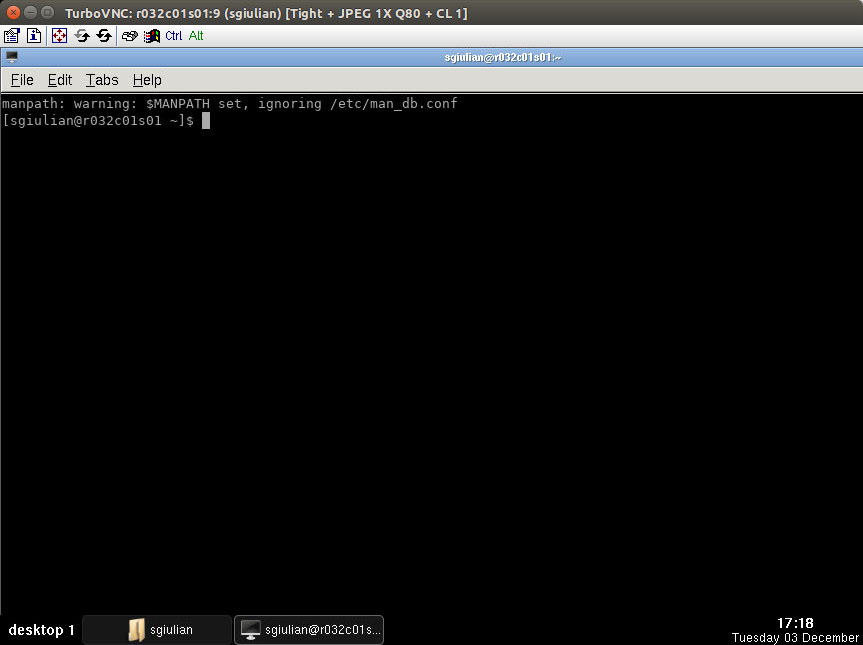
Note
The creation of a display can take some time depending on the workload of the cluster.
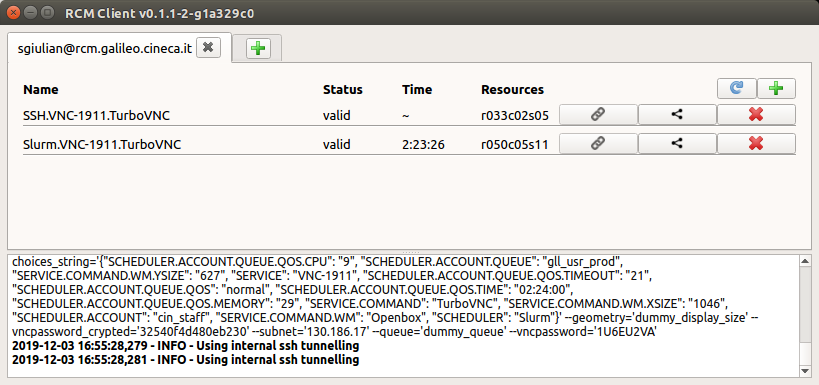
When a new display is created, a new item, showing the display details, will be added to the list of available remote display session on the RCM tab. Especially, the display details are:
Name: name of the display session
Status: the condition of the remote display session, pending (starting up the display session), valid (display session is running), killing (deleting the display session).
Time: the remaining time before the session will ends (if the display session has no time limit, this value is replaced by the symbol “~” ). Note that each display session has a time limit: over that time limit, the display will be automatically killed and not saved data will be lost.
Resources: the node of the cluster on which the remote display session has been created.
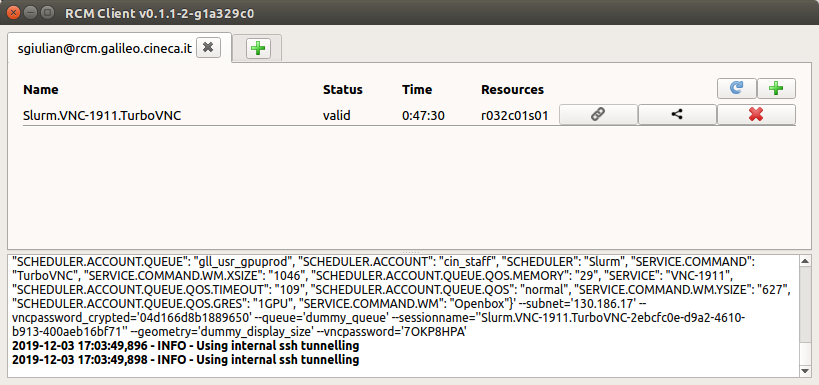
How to kill a Display
Display sessions can be killed by pressing the KILL THE REMOTE DISPLAY SESSION button. Just press the x button in the row associated with the remote display session you don’t want to use anymore, and it will be removed from the list of the available displays.
This operation can take some time, depending on the workload of the clusters. Note that by pressing it, the relative display will be not reachable anymore and you will lose not saved data.
Running a GUI-based Software
To execute a GUI-based application you have multiple options:
Load the module for the required software (i.e. paraview) * open the terminal within the graphical session of RCM
module load rcm
module load paraview
Launch the software form the terminal, i.e.:
paraview
If you are using GPU resources (i.e. using the setting SSH or SLURM), additional steps are required:
Load all the required modules
module load rcm
module load paraview
module load virtualgl
Launch the software form the terminal by using
vlgrun, i.e.:
vlgrun paraview
If you selected the Openbox GPU only window manager when creating the display, you only need to execute the visualization software using the vglrun command (i.e. for paraview):
vlgrun paraview
These steps ensure proper execution of visualization tools, particularly when utilizing GPU resources for accelerated performance.